CJ7 Build Page 23

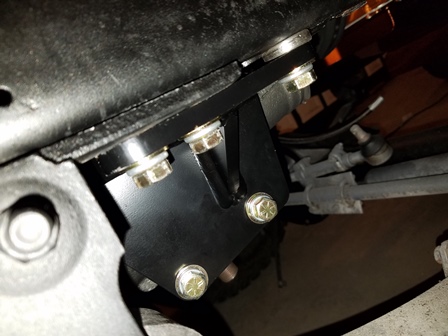
Figure 87. The next part is installing the frame bolts. Jack up the frame until the tension is off the leaf spring, then remove the bolts holding the spring schackle on. With the top bolts loose, you can slide the HD bracket out of the way while you do this. The frame nut here had a lot of corrosion and rust, and the new bolts would not start. The threads were cleaned with a tap and work continued. On the rearmost bolt there is a spacer that goes between the bracket and frame. Install all the new bolts, and torque the frame bolts to 37ft lbs. Torque the top bolts to 45ft lbs. Remove the jack and the steering gear is now back in the frame.

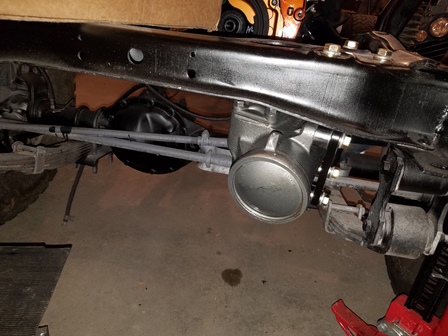
Figure 88. Here is the finished product installed in the frame. The new steering gear is clear-coated from the factory and we felt it did not need to be painted. It looks good just the way it is.
On the other side of the crossmember, it will have to be notched to clear the hose fittings, this repositions the hose ports right under the lip of the crossmember.

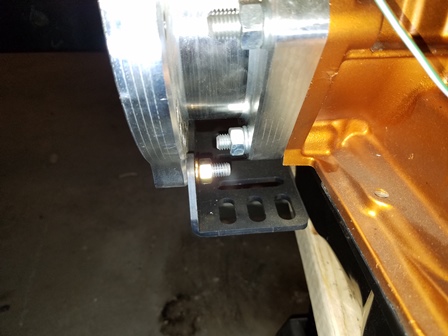
Figure 89. We are now going to install the GenRight Offroad Universal Crossmember. To begin we tightened up the mounting bracket that came with the Novak Conversion Kit. The urethane transmission mount bolts to this bracket.

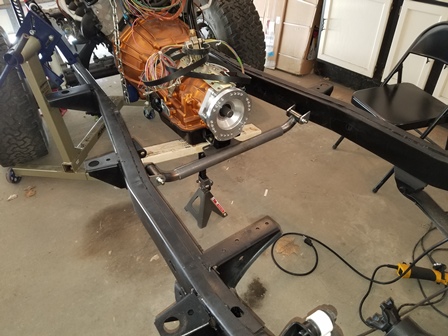
Figure 90. The mount plate has been welded to the center section and the crossmember is being test fit. Each side has a short tab and a long tab that will be welded to the frame. During fitting, we discovered that due to the angle of the jeep frame rail, the long tab is approximately an eighth of an inch too short. While we could have ground an eighth off of the short tab to adjust for that, we felt that would bring the bushing closer to the frame than we would like, so we are having new longer tabs made for the long side instead. When those are done, they will be welded to the frame and the rest of the crossmember will be welded up and completed.
| Pages: 1, 2, 3, 4, 5, 6, 7, 8, 9, 10, 11, 12, 13, 14, 15, 16, 17, 18, 19, 20, 21, 22, 23, 24, 25, 26, 27, 28 |
