CJ7 Build Page 5

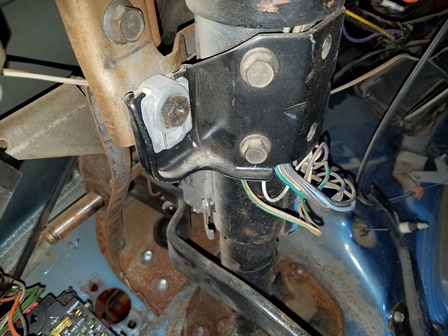
Figure 15. To Remove the steering column, disconnect the linkage, then remove the bolt that is on each side of the bracket shown in this photo. the steering column will then drop down. If you previously sprayed the coupling on the shaft on the engine side of the firewall, a couple good sharp tugs should free it, then you can pull the steering column out of the tub.

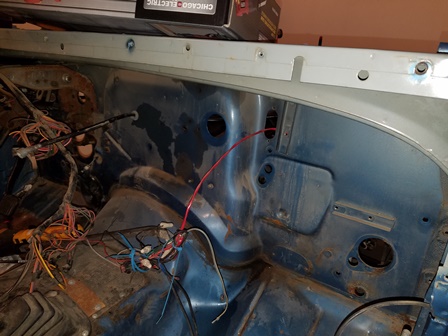
Figure 16. Here all the heater box assemblies have been removed. We got in too much of a hurry to remove the upper vent tube, and used a prybar and cracked the tube. This piece is no longer made, and is not a cheap piece at a salvage yard. We should have heated up the seal so it would come loose without excessive prying. An expensive mistake. One note here, we are not going to use the original wiring harness, so for ease of disassembly, we cut the wires instead of disconnecting them. This harness is really not that complicated, but we will purchase a pre-made unit when the time comes.

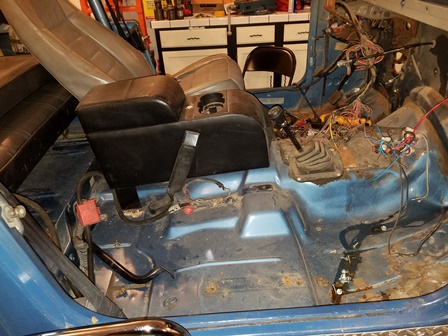
Figure 17. Started removing the seats and seat belts. The seats came out fairly easily. The seat belts are held on with the torx head bolts from the devil. Some of them came out, others did not. For us, it was not worth fighting the ones that did not come out and the belt held by them will remain with the tub when it is removed.

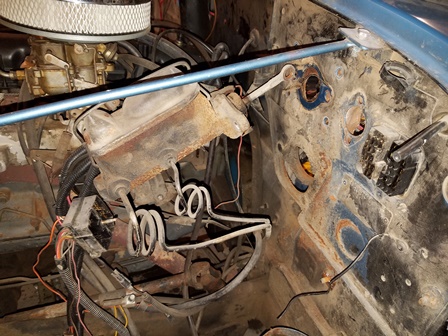
Figure 18. The master cylinder was removed, along with the pedal assembly. Both the brake pedal assembly and the emergency brake pedal assembly are heavily rusted. If replacements can be located, they will be changed out. The emergency brake cable is also in very bad shape.
| Pages: 1, 2, 3, 4, 5, 6, 7, 8, 9, 10, 11, 12, 13, 14, 15, 16, 17, 18, 19, 20, 21, 22, 23, 24, 25, 26, 27, 28 |
