LS Harness Conversion Page 4
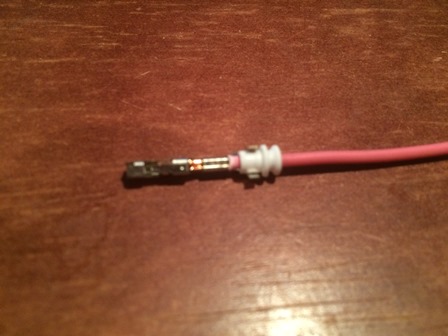
Figure 13. After crimping the wire, then the seal is slid back into the terminal to be crimped also. If you have the same style of crimpers that we are using, the wire is crimped in slot E.
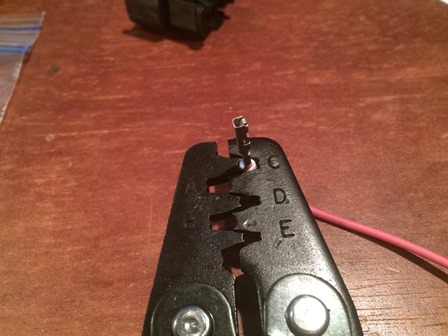
Figure 14. In this image, you can see we crimped the seal in slot C. That was a mistake and it was crimped too tight and split the seal. The terminal had to be cut off and a new one installed with the seal crimped in slot B. We could have saved a lot of headache and just looked up the appropriate slot to use with these seals, but we did not, and learned through trial and error.
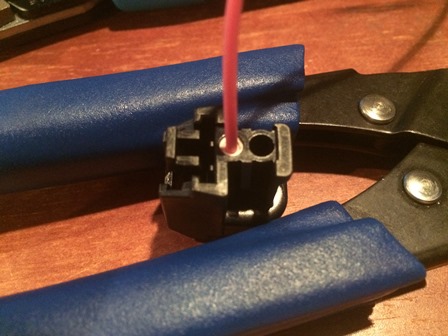
Figure 15. When your crimp is done, you push the completed terminal into the connector in the appropriate slot until it clicks, and you are done with that wire. All of the Delphi connectors for this harness are done in the same manner. If you are going to build your own harness like we are, there are a LOT of wires to connect. In the next few pages we are going to detail each connector and the wires that go with them.
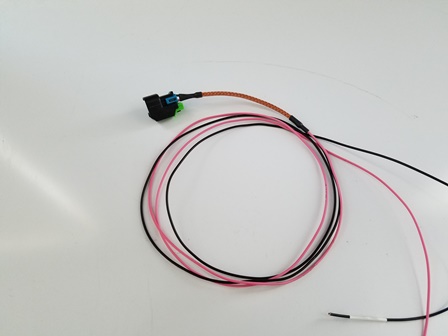
Figure 16. Injector 1 EV6 Connector, Delphi part number 15497399, connector lock part number 13821935, terminal lock part number 15423278, 18ga female terminal part number 12191819, white 18ga cable seal part number 15366021. Wire A is 18ga TXL Black. Wire B is 18ga TXL Pink. Wire A is hooked to pin 36 on the Blue PCM Connector. Wire B is hooked to Run/Start Injector Fuse A, 15 amps.
| Pages: 1, 2, 3, 4, 5, 6, 7, 8, 9, 10, 11 |