4L60E Transmission Rebuild Page 29 of 29
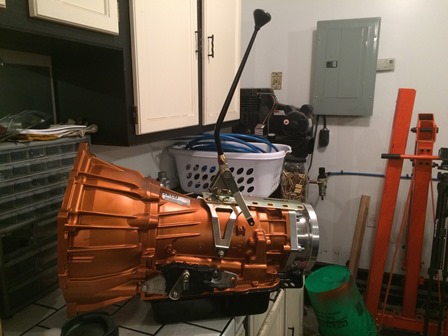
Figure 113. Install the shifter on the plate in the position you need it. If it is farther back than the two side plates, there are screws supplied for it. If it installs where the bolts for the side plates are, take the side plate bolts out, place the shifter on the plate, and re-install the bolts.
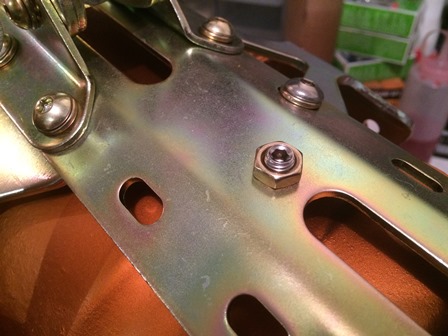
Figure 114. New, longer set screws had to purchased. The screws that came with the kit were too short, and did not reach transmission case, and there would have been no threads left to lock them down with the jam nuts. One of the failings of the kit.
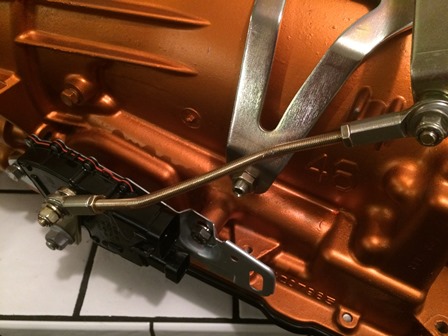
Figure 115. The lingake rod was clamped in a bench vise and bent for clearance, then meausured and cut to fit the distance between the two rod ends. Everything clears.
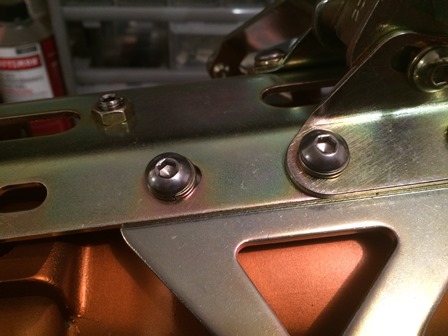
Figure 116. Another failing of the kit, is the button head screws are extremely soft. The hex in them rounded out with nearly zero torque applied to them. Replacements out of stainless were purchased at the local fastener supplier, and they work much better.
| Pages: 1, 2, 3, 4, 5, 6, 7, 8, 9, 10, 11, 12, 13, 14, 15, 16, 17, 18, 19, 20, 21, 22, 23, 24, 25, 26, 27, 28, 29 |
| <--Previous | 4L60E Rebuild Home |
| Contact: Copperhead | As an Amazon Associate I earn from qualifying purchases | © 2019 |