Front Dana 44 Rebuild Page 1

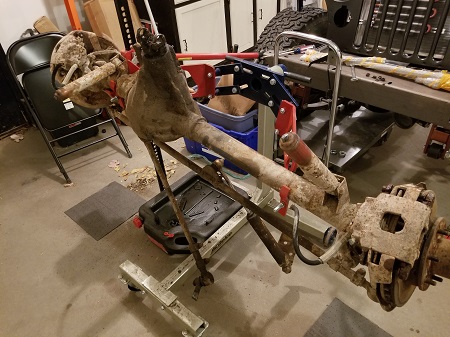
Figure 1. We do not beleive the stock dana 30 will handle the horsepower of the 5.3L LS engine. To that end, we will be replacing it with a Dana 44 front axle. You may ask, why not go with a Dana 60? The answer to that is, yes, the 60 is much stronger, it also is much more expensive to build, by an order of magnitude, and it also, by virtue of its size, sacrifices some ground clearance. We feel that the 44 is a good compromise between strength, size, and cost. As long as we are careful, we think we can make it survive as we do not plan on running 40 plus inch tires on this machine.
After much searching, we found this Dana 44 front axle with a passenger drop out of a 1978 Cherokee. This axle is the same width as a Wagoneer front axle, which is also a popular choice for a CJ conversion. These axles are getting harder and harder to find, and we found this one at a very reasonable price at a junkyard that was three hours drive away.
The plan for this axle is to shorten it 4 inches, install an Aussie Locker, 4:88 gears, and do the ford 5 x 5.5 conversion on the hubs to use the stronger gm 1/2 ton locking hubs on it. We will also convert to high steer, and install stronger inner C's on it, since we have to narrow it anyway. We also will get a set of Mitchell alloy axles for it. The long side will be a custom length for the 4 inch narrowing, and the short side will be stock length.

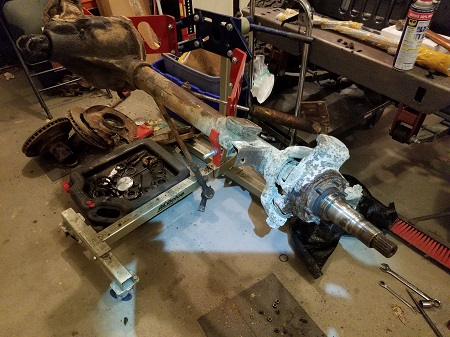
Figure 2. This build begins with tearing down this axle to the bare housing. We start with removing the wheel hubs, and brakes. We will not go into detail about that here, there are tons of information on hub disassembly available in far more detail than we can do here. We removed them on both sides. This unit had apparantly been sitting in the junkyard for a long time, the hubs and disc brake brackets were all shot. Basically the only thing we are going to keep from this unit is the housing.

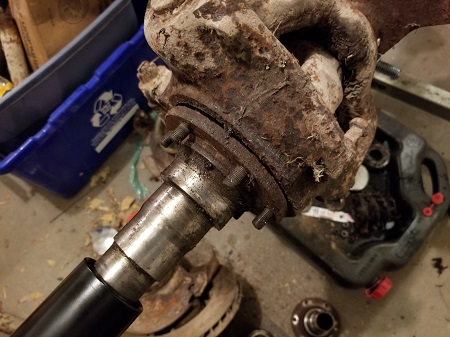
Figure 3. You can see the encrustation from sitting on the ground here on the knuckle. One of the most challenging parts of the disassembly is removing the spindle. For one like this that has been on the car for more than 40 years, rust has basically welded the spindle to the knuckle. Without the proper tool, this thing will not budge, even with trying to wedge screwdrivers, chisels, etc behind it. Many recommend using a block of wood and big hammer to beat it off, but sometimes even that does not work, and using heat may damage the spindle or knuckle.


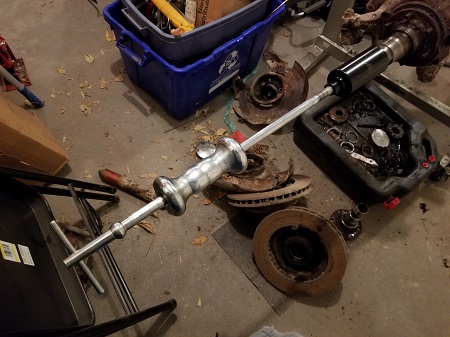
Figure 4. The OEMTOOLS 27104 4-Wheel Drive Spindle Puller Attachment is the tool we bought to take the spindle off. It is a slide hammer attachment. If you work on 4x4 front axles, this tool is a must have, it makes taking the spindle off a breeze. Screw the tool on, screw in the slide hammer, a couple good taps, and the spindle pops right off, no beating on it, no heat, all good.
We have done spindles before the hard way, and we can not say enough good things about this tool, or one like it. Well worth your money, no more risk of damage to your spindle and you can put one of these in your trail tool kit if you break an axle and it will make it easy peasy to swap out your broken axle with a spare.
| Pages: 1, 2 |
