Steering System
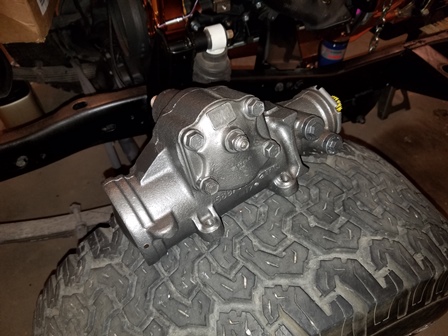

Figure 1. This jeep originally had a power steering gearbox on it. We wanted to keep that, but improve upon it. Research lead
us to the SG062 unit from PSC, but the price tag for it was very high. We continued to look for alternatives, and came across
several posts on various boards about using an H1 Remanufactured Gear Unit. This unit has the same variable ratio as the PSC unit,
and a larger piston. While these are remanufactured units and not new like the PSC unit, we have not read any posts where
someone did not like the upgrade. The price is also 1/3rd the cost of the PSC unit. They are not readily available anymore either,
and took some looking to find one, but here it is. It bolts right up to the CJ7.
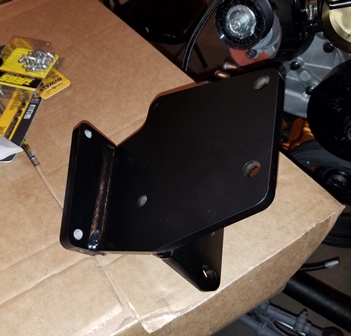

Figure 2. Along with the H1 box, we are going to install the M.O.R.E. SB7686-1Z Heavy Duty Steering Box Mount. This bracket replaces
the weak sheet metal brackets that the jeep originally used, as well as moving the steering gear 1-1/4 inch forward for better
clearance. The bracket comes as raw metal, and we had it powercoated black satin. This is a very nice piece, thick and strong.
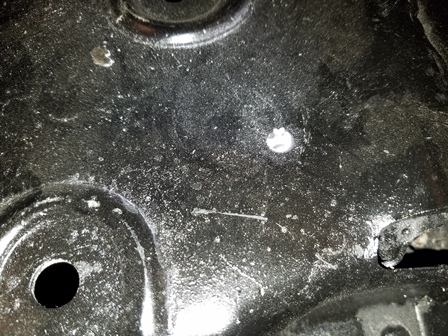
Figure 3. One of the first steps involved in the installation of the HD bracket is 1/2 hole must be drilled in the top of the crossmember. To get the position of the hole, you put the bracket on the top of the crossmember, then hold it down with bolts in the two normal bolt positions. you use the third bolt hole in the bracket to mark the position of the hole to drill. The bracket has a piece in the way of using a long pencil or marker. We dipped one of the bolts in line marking chalk, then put the bolt in the bracket and instant hole marked as seen here.
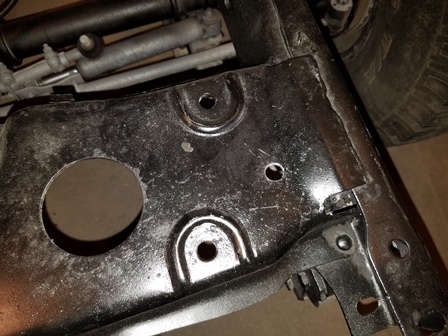
Figure 4. Here the hole has been drilled and we are ready to install the bracket and steering gear. The instructions call for notching the crossmember where the hoses attach to the steering gear, but we are going to try an alternative that hopefully will allow us to hook up the hoses without notching the frame. That will be detailed at a later time.
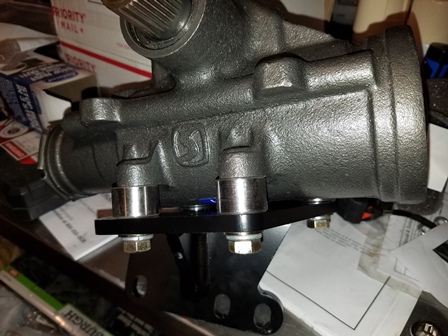
Figure 5. Attach the steering gear to the bracket using the spacers and the supplied hardware that came with the kit. The bolts are torqued to 45ft lbs.
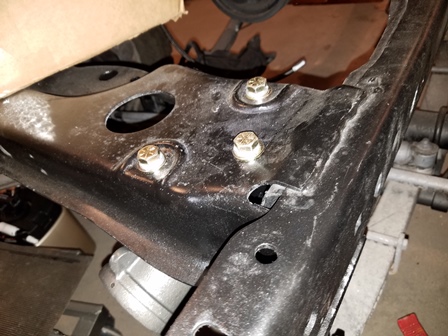
Figure 6. Now comes the fun part, you must wrestle the unit into position and start the bolts to attach it to the frame. It is fairly heavy and awkward to do alone. We had the use of a small scissor lift platform to hold it up while the top bolts were started. Only tighten them finger tight to this point.
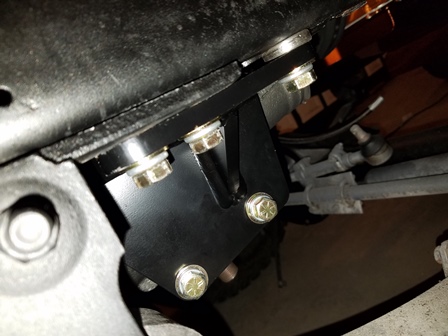
Figure 7. The next part is installing the frame bolts. Jack up the frame until the tension is off the leaf spring, then remove the bolts holding the spring schackle on. With the top bolts loose, you can slide the HD bracket out of the way while you do this. The frame nut here had a lot of corrosion and rust, and the new bolts would not start. The threads were cleaned with a tap and work continued. On the rearmost bolt there is a spacer that goes between the bracket and frame. Install all the new bolts, and torque the frame bolts to 37ft lbs. Torque the top bolts to 45ft lbs. Remove the jack and the steering gear is now back in the frame.
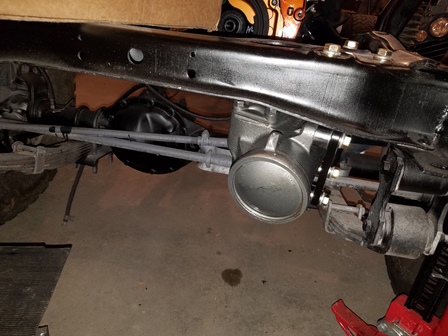
Figure 8. Here is the finished product installed in the frame. The new steering gear is clear-coated from the factory and we felt it did not need to be painted. It looks good just the way it is.
On the other side of the crossmember, it will have to be notched to clear the hose fittings, this repositions the hose ports right under the lip of the crossmember.
Disclaimer: The information provided here is how I did it. I strongly urge you to do your own research and make sure you do it right. No claim is made that the information provided is the only way it should be done, or that you should follow my work without verifying for yourself that it is correct. You are free to do as you choose with the information shared here, but you do so at your own risk.
