Fuel System
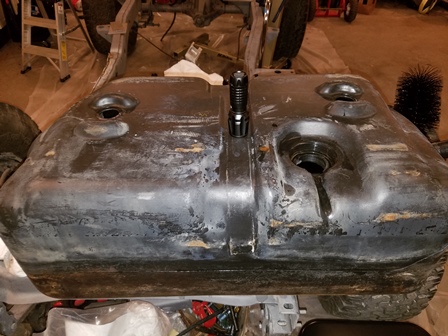
Figure 1. Here is the used 20 gallon gas tank we acquired for this project. In this image, it is just back from the car wash where we pressure washed it. We had let it soak overnight with 2 bottles of fuel injection cleaner inside to clean all the gunk out of it before taking it to the car wash. After this image was taken, the tank was filled about 1/3 with water and a liberal application of dawn dish soap which was swished around at regular intervals for a couple hours, then the outside was scrubbed again by hand to get any stubborn clumps of dirt off. The dish soap was left to sit in it overnight, then rinsed out again and left to dry before installing it in the skid plate.
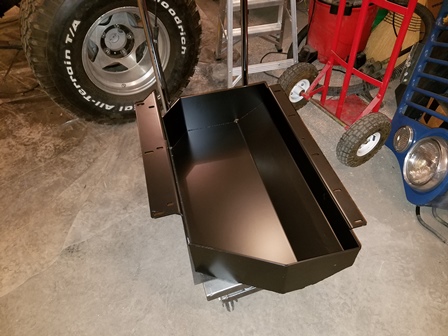
Figure 2. This is the GenRight Crawler skid plate. This thing is 3/16 inch thick steel and very solid. A little pricey, but very nice. We were going to get a slightly cheaper one the same thickness from a different maker, but they did not have any on hand and we did not want to wait to get it. This unit weighs 80 pounds empty, and has a nice powdercoat finish on it.
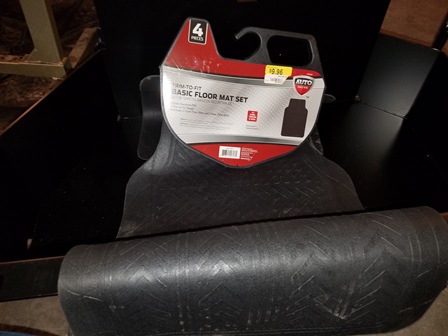
Figure 3. The original type rubber liner for the 20 gallon gas tank is no longer available. We substituted a cheapo rubber floor mat from Walmart and cut the pieces to fit. They are approximately the same thickness as the original and will serve the purpose just fine. A little money saved here and works just like the factory piece.
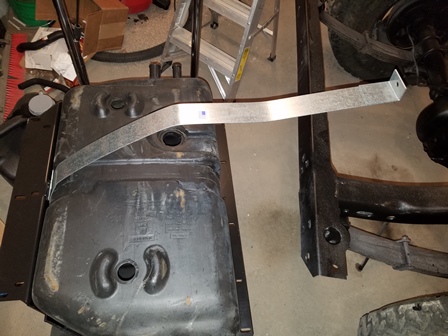
Figure 4. We bought what was advertised as a 20 gallon gas tank strap for a CJ7. As can plainly be seen, it is not. This strap is more than 10 inches too long, and is useless for use on the tank without heavy modifications.
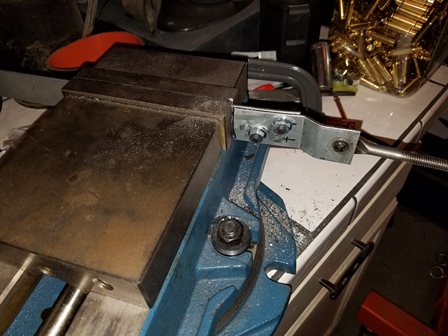
Figure 5. A strap for a 15 gallon tank was purchased. It was still about 4 inches too long. We cut it off, then overlapped the cut pieces and drilled and bolted them together. Button head screws were used to give a low profile on the back side of the strap.
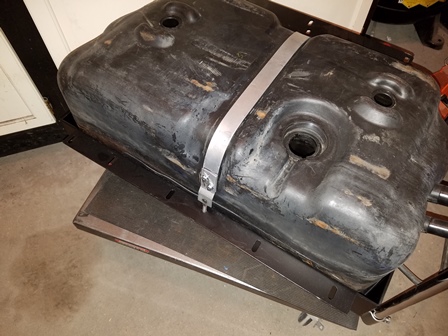
Figure 6. The modified 15 gallon strap now fits very well. It looks nice also. Now the gas tank installation can proceed.
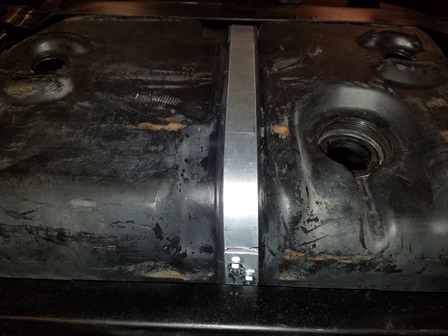
Figure 7. For a cushion to use under the strap as insurance against rubbing a hole in the plastic tank, we took a 26 inch heavy duty bicycle tube and cut it in half and tucked it under the strap. It looks good and works very well, giving two layers of protection to the tank.
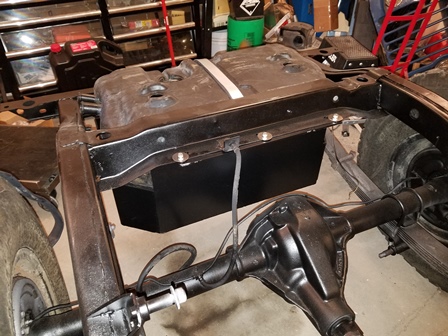
Figure 8. The tank and skid plate was raised into position and bolted in. The new skid is very heavy, you will need a jack or a lift to get it up in there. We used stainless steel hardward, so if we have to take out later the screws will not be a rusted mess to get out.
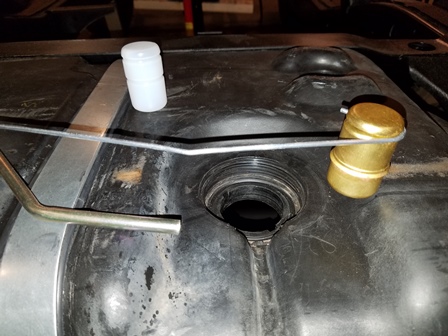
Figure 9. The float on the replacement sending units that are available now have plastic floats on them. Various forums have lots of posts about how the plastic floats fail over time and fill with gas and no longer work. We replaced it with this brass float from a 65 Mustang. It fits perfectly, and is cheap.
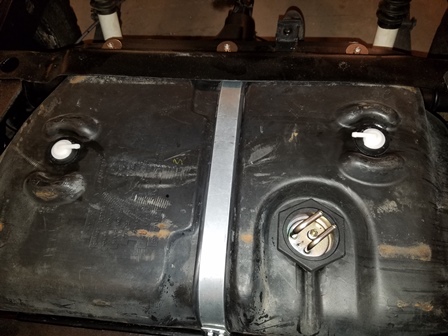
Figure 10. The o-ring was put in then the sending unit set in the tank with the sock filter on the intake tube. The nut was then tightened down. The two grommets for the rollover check valves were lubricated with Windex (wonderful stuff), then placed in their holes. Sprayed down with Windex again, and the rollover check valves were inserted.
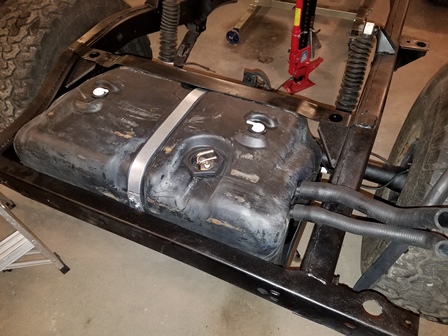
Figure 11. The J5362158 Fuel Filler Hose and J5362159 Fuel Filler Vent Hose
are installed. We now have to plumb the fuel lines, and the vent hoses. We also need to
get clamps and fittings. Still not sure where we are going to mount the fuel pump yet though.
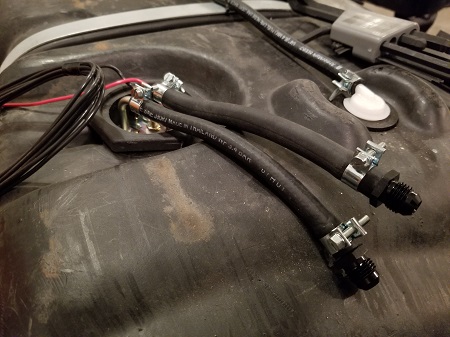
Figure 12.
We have to adapt the CJ7 fuel sending unit to AN lines. The feed to the engine starts out at 5/16 on the sending unit, and the return is 1/4. We used an adapter fitting, 6AN Male Flare x 5/16 Hose Barb Fitting Black Anodized, on the side out to the engine. We also used a 6AN Male Flare x 1/4 Hose Barb Fitting, also black anodized. The 1/4 adapter came from Racetronix. We used a short section of fuel injection rubber hose on each side, with fuel injection clamps. These will bring the fuel lines out close to the frame rails.
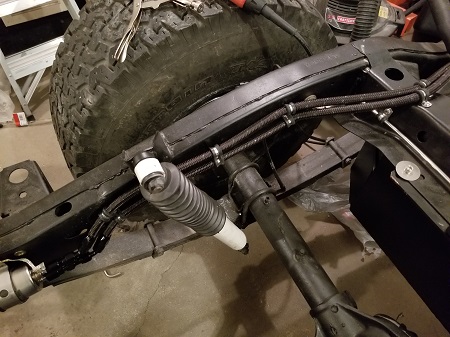
Figure 13. The lines are now run from the gas tank stub hoses to the Wix regulator. Russell 632093 ProClassic Black Hose was used and Russell Cushion clamps attach it to the frame. On the fittings from the WIX 33737 Fuel Filter/Regulator
, the bottom one, which is the pressure line, needed a Vibrant Performance 1 Inch Female to Male 6AN Extender Fitting
to clear the upper return fitting. Two Russell 613095 Swivel Hose End 45 6AN
attach the hoses on each end. The adapters for the filter/regulator are Russell 640853 6AN Male to 3/8" SAE QD Female Push-On EFI Fitting
and Russell 640863 6AN Male to 5/16" SAE QD Female Push-On EFI Fitting
, on the other side of the filter is a Russell 640940 6AN Male to 3/8" SAE QD Male Push-On EFI Fitting
.
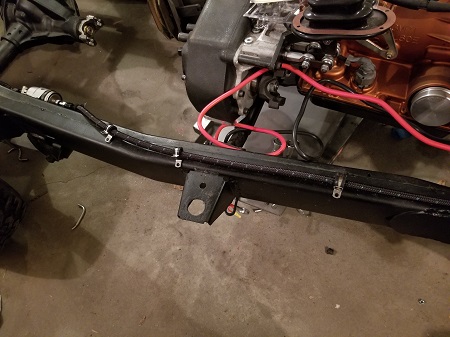
Figure 14. The fuel line after the filter/regulator was done in the same Russell Pro-Classic hose, and ran on top of the frame rail. Again, Russell 650980 Cushion Clamps were used.
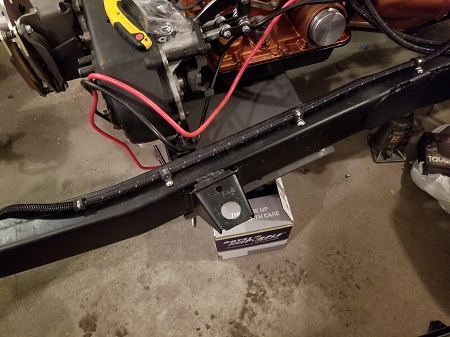
Figure 15. The fuel line is now mounted to the frame. Where the line might be subject to rubbing or other forms of abrastion, generic 1/2 inch split loom was placed over the line to protect it.
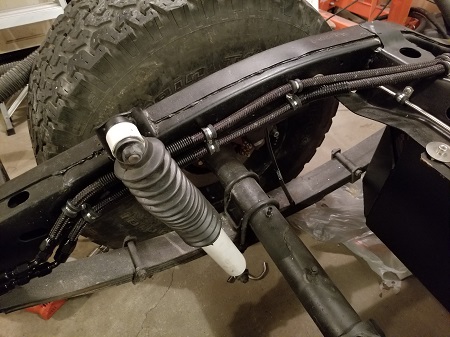
Figure 16. A view of the rear section of fuel lines protected with the 1/2 inch split loom.
Disclaimer: The information provided here is how I did it. I strongly urge you to do your own research and make sure you do it right. No claim is made that the information provided is the only way it should be done, or that you should follow my work without verifying for yourself that it is correct. You are free to do as you choose with the information shared here, but you do so at your own risk.
