Rear Dana 44 Build Page 2
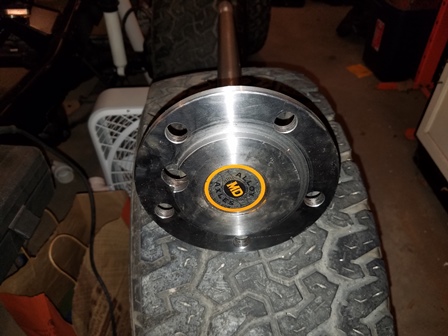
Figure 5. The new axles from Mitchell Differential came in, and here they are. Very nice work, and look to be very strong, which is exactly what we need with the horsepower that is going to be transmitted through them. We opted to have them cut with the access hole for the retainer plate bolts.
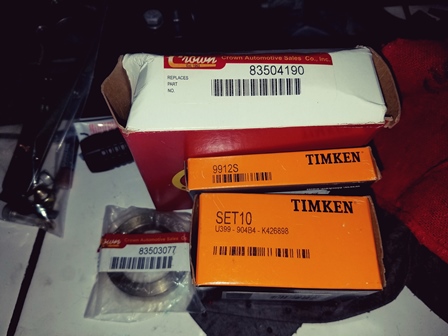
Figure 6. These are the new parts that will be going on the axles. The lock collar on the left of the group turned out to not be needed, as a lock collar comes with the SET10 bearing. So, we have a retainer plate part number 83504190, seal part number 9912S, and the bearing part number SET10. The un-needed collar was Crown part number 83503077.
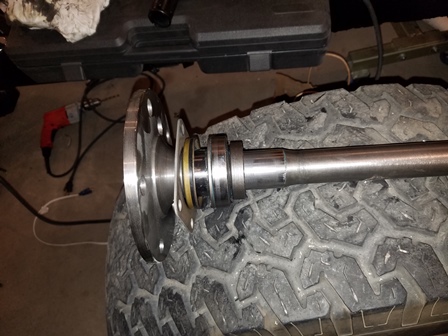
Figure 7. Here is the bearing assembly pressed on to the axle. We can attest that a Harbor Freight 12-Ton press will do the job, but it struggles with it, the assembly goes on very tight. Make sure you put the bearing on facing the right way. We accidently put one on backwards and had to cut it off and purchase another one. The seal is a double-lip seal. Before installing it ont he axle, the gap between the two lips was filled with grease. This keeps the lips lubricated on the shaft and prevents the rubber from getting burned from excessive friction on the axle shaft.
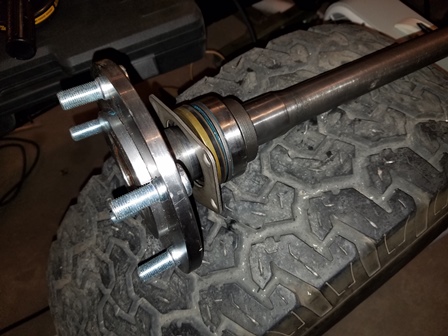
Figure 8. Here is the completed axle assembly. The studs were purchased from the local Oreilly's Auto Parts. They are cheap and plentiful. We used the hydraulic press to install them. Not shown here, but the bearing was wrapped in a shop towel and tape ran around it to keep dirt out of it until it is time to install it into the axle housing.
| Pages: 1, 2, 3, 4, 5, 6, 7, 8, 9, 10, 11 |