Dana 300 Rebuild Page 4
| <--Previous | Dana 300 Home | Next--> |
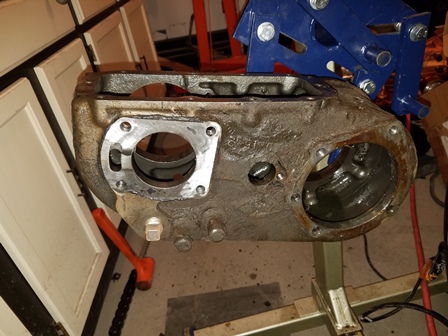
Figure 013. The transfer case is now completely disassembled and ready to send out for cleaning. The front output shaft housing will need to be machined out for the larger bearing for the new heavy-dut output shaft. Once the cleaning and machining is complete, re-assembly of the transfer case will begin.
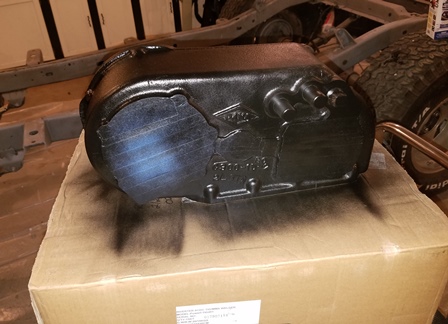
Figure 014. The housing came back from the shop all grease and dirt free. It started rusting pretty quickly on the outside. It was cleaned with a wire brush and a scotch brite pad, then masked for paint. We used Eastwood Rust Encapsulator on it. It left a very nice finish. Two coats of paint were applied.
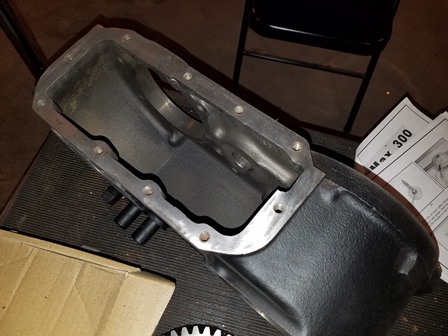
Figure 015. The housing really looks nice now, the paint came out beautiful and the housing is all cleaned up and ready to install the new gears and shafts.
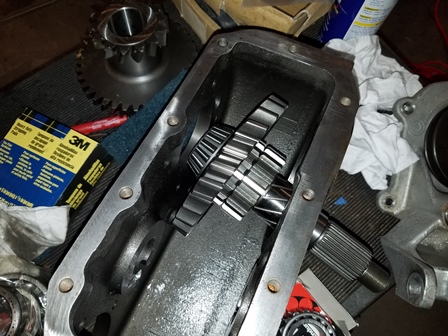
Figure 016. Assembly begins with the JB Conversions HD front output shaft. This shaft has the 32 splines and larger diameter. The large gear is put on, then the bearing is pressed on.
| Pages: 1, 2, 3, 4, 5, 6, 7, 8, 9, 10, 11, 12 |