Drivetrain
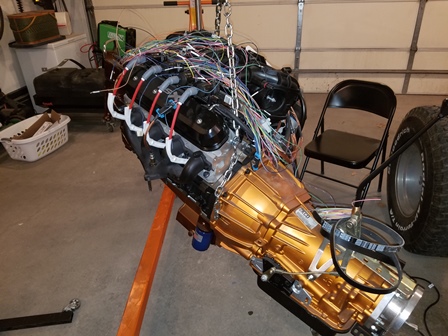
Figure 1. We now begin to install the engine and transmission into the frame. Here it is being hoisted into the air to move it over the top of the frame.
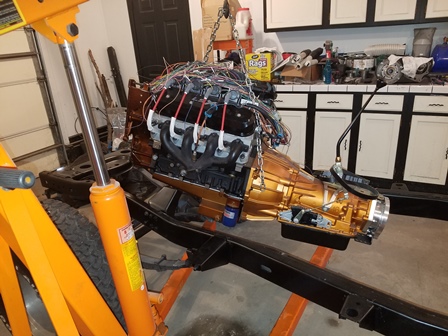
Figure 2. Here we are setting it into the Novak Conversions Motor Mounts. We had to put it in from the side, as the nose of the frame did not give us enough length of the hoist arm to get it centered over the motor mounts. Getting the carriage bolts that are in the motor side of the mounts into the frame side mount is a little finicky, but overall went pretty smooth.
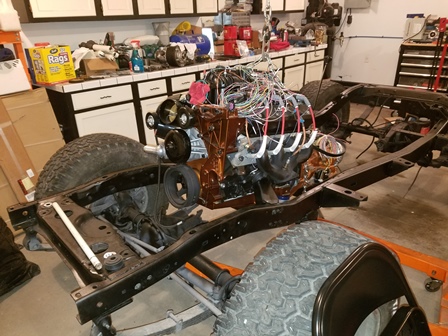
Figure 3. The full weight of the engine is now down on the mounts. The motor mount carriage bolt does not have the nuts and lower rubber cushion yet as the engine may have to be shifted around. The transmission also needs to be supported until the rear crossmember can be welded up. One thing we did not like about the Novak mounts, it was extremely diffcult to get the rubber pucks aligned and into the holes in the frame mounts. A lot of pushing, and pulling and jockeying it around finally got them into position. Doing it alone was not easy.
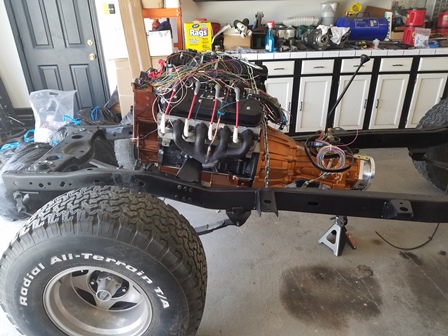
Figure 4. The transmission is now supported by a jack stand. We still need to set the final engine tilt at approximately 0 to 3 degrees back tilt. If it is not set properly, the engine will contact the body. We also need it set to position the rear transmission crossmember in the frame, and take measurements for how much drop we need for the new skidplate. We want as close to 0 drop as we can get, but we can get up to 2 inches of drop if need be.
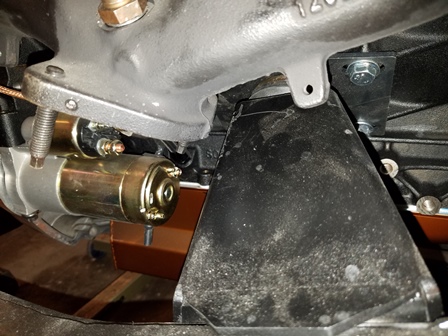
Figure 5. Something that comes up often on various boards and forums is how much clearance is there with C6 Corvette manifolds and the Novak mounts. As you can see here, there is plenty of clearance and the mounts on the engine are on the center hole, they could be moved back to gain even more clearance if need be. There is at least 1/2 inch on both sides of the engine with the center holes.
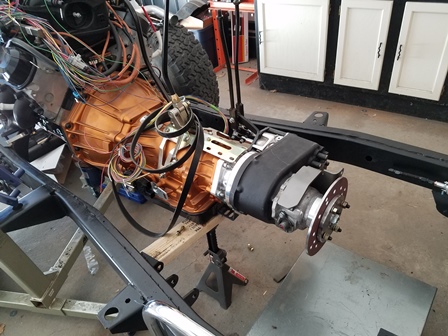
Figure 6. The transfer case has now been installed for the final time. It is clocked as flat as the Novak adapter will allow. We may have front driveshaft clearance problems, we do not know for sure yet. It is a tight fit though.
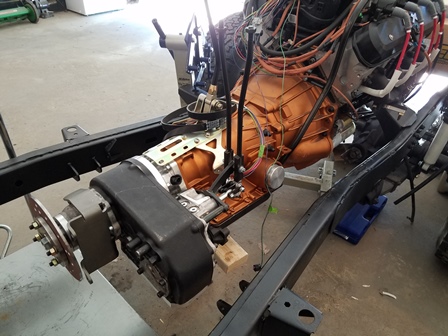
Figure 7. Another view of the transfer case install with the twin-stick shifter. The driveline brake will look real nice when it is finished.
Disclaimer: The information provided here is how I did it. I strongly urge you to do your own research and make sure you do it right. No claim is made that the information provided is the only way it should be done, or that you should follow my work without verifying for yourself that it is correct. You are free to do as you choose with the information shared here, but you do so at your own risk.
