4L60E Transmission Rebuild Page 5 of 29
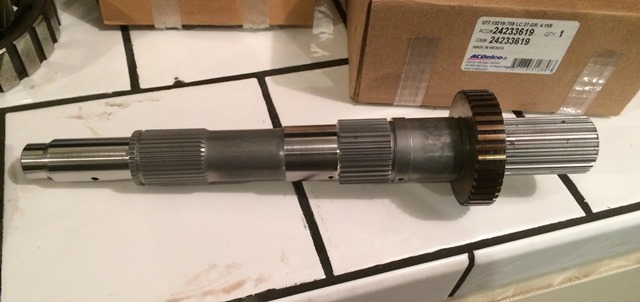
Figure 17. Here it is, the part that required the transmission to be opened up and rebuilt. This is the modified output shaft that is part of the Novak kit. This shaft, along with the case-to-Dana 300 adapter are what make this kit work.
The vehicle speed sensor will be ahead of the transfer case, and mounts in the adapter housing. You can see the pickup wheel mounted on the shaft.
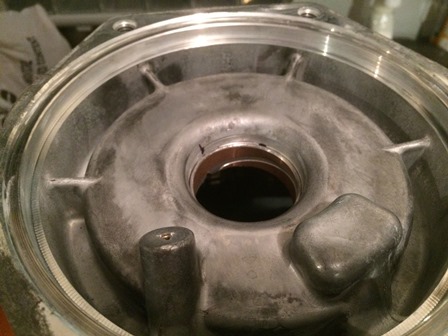
Figure 18. Now that everything has been torn down, parts purchased, and everything cleaned, it is time to start putting it back together. The first thing to do is change the case bushing.
The drivers for all the bushings in this transmission are very expensive. Far too expensive for me to purchase for a one-time use. Most of the bushings can be handled by the inexpensive bushing driver kit from Harbor Freight. This one, however, will not fit those drivers. A large socket from the local auto parts store fit the bill to use as a driver. Mark the location of the notches in the old bushing before driving it out. Install the new bushing with the notches at the marks from the old one.
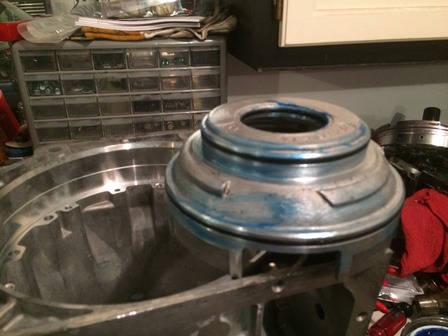
Figure 19. The low-reverse piston will be re-used, as it is in good shape. Replace the seals on it from the kit, then use assembly lube and lubricate the bore in the case, and the piston and seals.
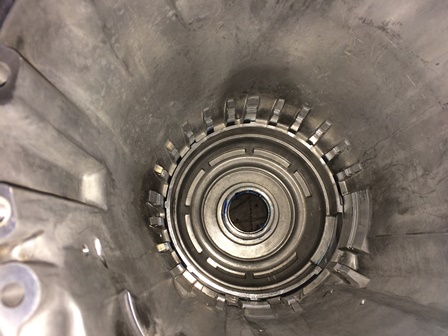
Figure 20. Push the piston into the case. A hammer handle works well to help push it into the bore until it bottoms.
| Pages: 1, 2, 3, 4, 5, 6, 7, 8, 9, 10, 11, 12, 13, 14, 15, 16, 17, 18, 19, 20, 21, 22, 23, 24, 25, 26, 27, 28, 29 |
| <--Previous | 4L60E Rebuild Home | Next--> |
| Contact: Copperhead | As an Amazon Associate I earn from qualifying purchases | © 2019 |